
Viking ovens are known for their durability and high performance, but regular cleaning is essential to maintain their efficiency and appearance. This guide provides step-by-step instructions on how to clean your Viking oven effectively, covering both interior and exterior surfaces. From natural cleaning agents to advanced self-cleaning features, we’ll explore the best methods to keep your oven in pristine condition. Whether you’re dealing with tough grime or routine maintenance, these tips will help you achieve a sparkling clean Viking oven with ease.
Importance of Regular Cleaning for Viking Ovens
Regular cleaning is crucial for maintaining the performance and longevity of Viking ovens. Over time, food residue and grime can build up, affecting the oven’s efficiency and potentially causing damage. A clean oven ensures consistent cooking results and prevents the spread of bacteria; Additionally, regular maintenance enhances safety by reducing the risk of grease fires and unpleasant odors. Cleaning also helps preserve the aesthetic appeal of your Viking oven, keeping it looking like new. By incorporating a routine cleaning schedule, you can extend the lifespan of your appliance and ensure it continues to function at its best. Proper care not only safeguards your investment but also contributes to a hygienic and pleasant cooking environment.
Overview of Viking Oven Features and Cleaning Requirements
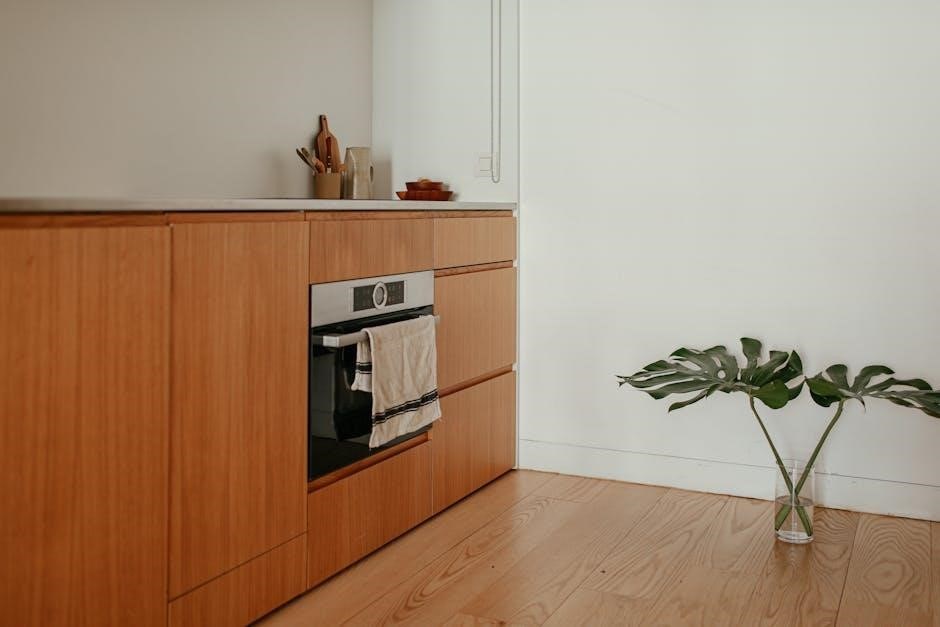
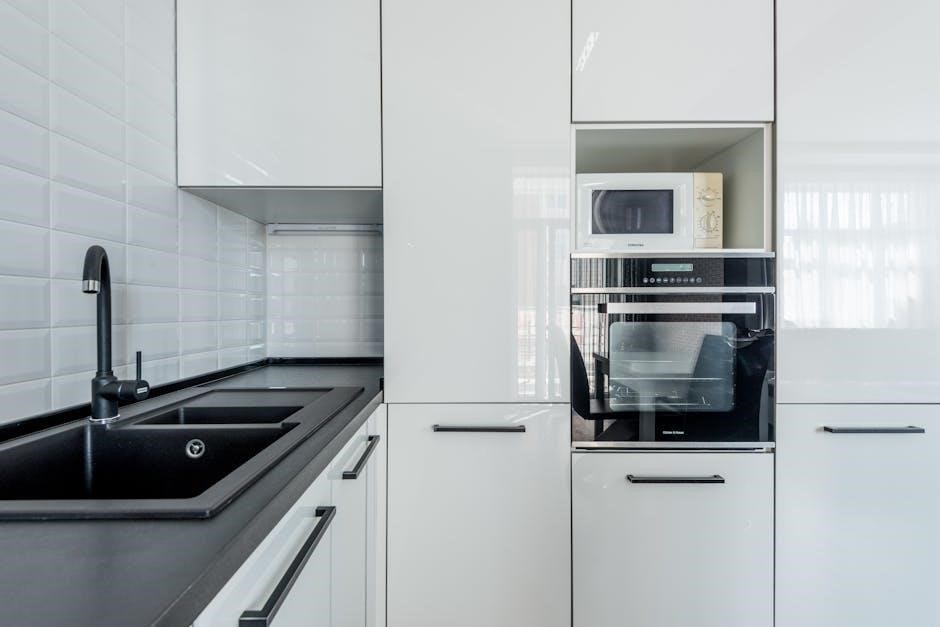
Viking ovens are renowned for their advanced features, including high-performance burners, precision temperature control, and durable stainless steel construction. These features require specific cleaning approaches to maintain their functionality and appearance. The oven’s interior, including racks, walls, and the floor, needs thorough cleaning to remove food residue and grime. Exterior surfaces, such as the control panel and door, should be wiped down regularly to prevent fingerprints and splatters. Additionally, the self-cleaning feature, available in many models, simplifies deep cleaning by locking in high temperatures to burn off tough stains. Understanding the unique cleaning needs of each component ensures effective maintenance and preserves the oven’s sleek design. Regular attention to these areas prevents the buildup of tough stains and keeps your Viking oven performing optimally.
Essential Preparation Steps for Cleaning a Viking Oven
Ensure the oven is cool, remove racks, and prepare natural cleaning agents like baking soda and vinegar. Avoid abrasive cleaners and wear protective gear for safety.
Turning Off and Cooling the Oven
Before cleaning your Viking oven, ensure it is completely turned off and allowed to cool down. This step is crucial for safety, as working with hot surfaces can lead to burns. Turn the oven controls to the “OFF” position and unplug the appliance if possible. Let the oven cool for at least 30 minutes to an hour, depending on recent usage. Never attempt to clean a hot oven, as this can damage surfaces or cleaning agents. Allowing the oven to cool ensures a safer and more effective cleaning process. Always prioritize caution to avoid accidents. Once cooled, you can proceed with removing racks and preparing for a thorough clean. This preparation step is essential before using any cleaning agents or tools.
Safety Precautions Before Cleaning
Before starting the cleaning process, ensure all safety precautions are taken to avoid accidents. Always unplug the Viking oven from the electric outlet to prevent any risk of electric shock. Wear protective gloves and eye protection to shield yourself from harsh cleaning agents or debris. Avoid using abrasive cleaners or scrubbers, as they can damage the oven’s surfaces. Keep children and pets away from the cleaning area to prevent accidents. If using commercial cleaning products, ensure proper ventilation by opening windows or turning on an exhaust fan. Never mix cleaning agents, as this can create harmful fumes. By following these safety measures, you can ensure a secure and effective cleaning experience for your Viking oven.
Removing Oven Racks and Accessories
Before cleaning your Viking oven, it’s essential to remove all oven racks and accessories. Start by taking out the racks and placing them on a stable, heat-resistant surface. This allows for easier cleaning and prevents any damage to the racks during the process. If your Viking oven has additional accessories like trays or drip pans, remove those as well. Gently pull the racks outwards, ensuring they are completely cool to avoid burns. For stubborn racks that don’t slide out easily, use a soft brush or cloth to wipe away any food residue that may be causing them to stick. Once removed, set the racks aside for separate cleaning. This step ensures you have unobstructed access to the oven interior and helps maintain the overall cleanliness of your Viking oven. Always refer to your user manual for specific guidance if needed.

Gathering Necessary Cleaning Supplies
Gather natural cleaning agents like baking soda and vinegar, commercial oven cleaners, protective gloves, and tools such as brushes and microfiber cloths for effective Viking oven maintenance.
Natural Cleaning Agents: Baking Soda, Vinegar, and Water
Natural cleaning agents like baking soda, vinegar, and water are effective for cleaning Viking ovens without harsh chemicals. Mix baking soda and water to form a paste, applying it to interior surfaces to break down grime. Vinegar, with its acidic properties, helps dissolve tough stains and neutralize odors. For lighter cleaning, dampen a microfiber cloth with water and wipe down surfaces. These eco-friendly options are gentle yet powerful, ensuring a safe and chemical-free cleaning process. Always test a small area first to ensure no discoloration occurs. Avoid using abrasive materials that could scratch surfaces. Natural agents are ideal for maintaining your Viking oven’s appearance and functionality without exposing yourself or the environment to harmful fumes.
Commercial Oven Cleaning Products
Commercial oven cleaning products are specially formulated to tackle tough grime and stains on Viking ovens. These products often come in the form of sprays, foams, or gels, designed to penetrate and break down stubborn food residue. When using commercial cleaners, always follow the manufacturer’s instructions to ensure safety and effectiveness. Many of these products are designed for high-temperature environments and can be left to sit overnight for deep cleaning. However, avoid using abrasive cleaners or scrubbers, as they may damage the oven’s surfaces. Protective gear like gloves and eyewear is recommended when handling strong chemicals. For heavy-duty cleaning, commercial products are a reliable option, but be sure to rinse thoroughly afterward to remove any residue. Always test a small area first to ensure compatibility with your Viking oven’s materials.
Protective Gear: Gloves and Eye Protection
When cleaning your Viking oven, wearing protective gear is essential to ensure your safety. A pair of sturdy rubber or silicone gloves will protect your hands from harsh cleaning agents, hot surfaces, and sharp edges. These gloves are resistant to chemicals and provide a secure grip, preventing accidents while scrubbing. Additionally, eye protection, such as goggles or safety glasses, is crucial to shield your eyes from splashes of cleaning solutions or debris. Many commercial oven cleaners contain strong chemicals that can cause irritation or burns if they come into contact with skin or eyes. By wearing gloves and eye protection, you can clean your Viking oven confidently, knowing you’re safeguarding yourself from potential hazards. This precautionary step is especially important when using abrasive cleaners or scrubbing tools. Always prioritize safety to avoid injuries during the cleaning process.
Cleaning Tools: Brushes, Sponges, and Microfiber Cloths
For effective cleaning of your Viking oven, the right tools are essential. A sturdy brush with soft or medium bristles is ideal for scrubbing away tough grime and food residue on racks, walls, and the oven floor. Sponges, particularly those with a scrubbing side, are great for wiping down surfaces and absorbing spills. Microfiber cloths are excellent for polishing and drying surfaces, leaving them streak-free. When using natural cleaning agents like baking soda and water, a non-abrasive scrubber or sponge is recommended to avoid scratching surfaces. For heavier cleaning, a long-handled brush can help reach deep into the oven without straining. Always choose tools with durable, heat-resistant materials to withstand the high temperatures and rigorous cleaning process. These tools will make your Viking oven cleaning tasks more efficient and ensure a thorough cleanup.
Cleaning the Exterior of the Viking Oven
Cleaning the exterior of your Viking oven is crucial for maintaining its aesthetic appeal and functionality. Regular wiping of the oven door, handles, and control panel prevents grime buildup. Stainless steel surfaces can be polished to restore their shine. Avoid abrasive cleaners to prevent scratches. Instead, use mild soap solutions or specialized stainless steel cleaners. For tougher stains, a gentle scrub with a soft sponge or microfiber cloth works well. Always dry the surfaces thoroughly after cleaning to prevent water spots. This routine maintenance ensures your Viking oven remains a sleek and durable addition to your kitchen.
Wiping Down the Oven Door and Handles
Wiping down the oven door and handles is a simple yet effective step in maintaining your Viking oven’s exterior. Start by using a damp, soft cloth to remove any loose debris or fingerprints. For tougher stains, mix a mild soap with warm water and gently scrub the area. Avoid using abrasive cleaners or harsh chemicals, as they can damage the finish. For stainless steel surfaces, a specialized stainless steel cleaner or a mixture of equal parts water and white vinegar can be used to remove streaks and grime. Always dry the surfaces thoroughly with a clean, dry cloth to prevent water spots. Regularly cleaning the door and handles not only enhances the oven’s appearance but also prevents grime buildup, ensuring a sleek and durable finish for years to come.
Cleaning the Control Panel and Knobs
To clean the control panel and knobs of your Viking oven, start by gathering a soft, lint-free cloth and a mild soap solution. Dampen the cloth with warm water mixed with a small amount of mild soap, ensuring it is not soaking wet to avoid moisture seeping into the electronics. Gently wipe down the control panel, paying attention to any areas with visible fingerprints or splatters. For the knobs, remove them if possible and clean all surfaces thoroughly. For stubborn stains, a mixture of equal parts water and white vinegar can be effective. Avoid using abrasive cleaners or harsh chemicals, as they may damage the finish or harm the electrical components. After cleaning, use a dry section of the cloth to wipe away excess moisture and prevent water spots. Regular cleaning of these areas ensures optimal functionality and maintains the oven’s sleek appearance.
Polishing Stainless Steel Surfaces
Polishing the stainless steel surfaces of your Viking oven is essential to maintain its sleek and professional appearance. Begin by using a microfiber cloth to wipe down the exterior, removing any fingerprints or smudges. For tougher stains, apply a small amount of stainless steel cleaner or a mixture of equal parts water and white vinegar to the cloth. Gently rub the surface in a circular motion, ensuring even coverage. Avoid using abrasive cleaners or scrubbers, as they can scratch the finish. Once clean, buff the surface with a dry microfiber cloth to remove any streaks and restore the stainless steel’s shine. For stubborn fingerprints, a specialized stainless steel polish can be used for a flawless finish. Regular polishing not only enhances the oven’s aesthetics but also protects the material from corrosion and wear. This step ensures your Viking oven remains a standout feature in your kitchen.

Interior Cleaning of the Viking Oven
Cleaning the interior of your Viking oven involves tackling tough grime and food residue. Use natural agents like baking soda and vinegar to break down stains, then scrub walls and floors thoroughly. Rinse well to avoid residue.
Removing Food Residue and Grime
Removing food residue and grime from your Viking oven is a crucial step in maintaining its performance and hygiene. Begin by applying a paste made from baking soda and water to the affected areas. Allow the paste to sit overnight to break down tough stains. Use a non-abrasive brush or sponge to gently scrub away the grime, working from the bottom up to avoid spreading debris. For stubborn spots, a mixture of equal parts water and white vinegar can help loosen residue. After scrubbing, wipe down the surfaces with a damp microfiber cloth to remove any remaining grime and cleaning agents. Rinse thoroughly to ensure no residue is left behind, as this can affect the oven’s heating efficiency. Regularly tackling food residue prevents grime buildup and keeps your Viking oven in optimal condition.
Cleaning Oven Racks and Trays
Cleaning the oven racks and trays is essential for maintaining hygiene and performance. Start by removing the racks and trays from the oven while it’s slightly warm, as this makes grime easier to tackle. For heavy buildup, soak the racks in hot soapy water or a mixture of baking soda and water for several hours or overnight. Use a non-abrasive scrubber or sponge to remove stubborn residue, then rinse thoroughly with warm water. For tougher stains, apply a paste of baking soda and vinegar, let it sit, and scrub gently. Avoid using abrasive cleaners or harsh chemicals, as they can damage the finish. Once clean, dry the racks and trays with a microfiber cloth to prevent water spots before returning them to the oven. Regular cleaning prevents grime from becoming embedded and keeps your Viking oven functioning optimally.
Scrubbing the Oven Walls and Ceiling
Scrubbing the oven walls and ceiling is crucial for removing stubborn grime and food residue. Start by mixing a paste of baking soda, water, and a splash of vinegar; Apply the paste evenly to the walls and ceiling using a soft-bristled brush or sponge, ensuring full coverage. Let it sit for 30 minutes to an hour to allow the solution to penetrate tough stains. Use a non-abrasive scrubber or sponge to gently scrub away the grime, working from the top down. Rinse the sponge frequently to avoid spreading residue. For particularly stubborn areas, repeat the process or let the paste sit longer. Once clean, wipe down the surfaces with a damp microfiber cloth to remove any remaining paste and residue. Regular scrubbing helps maintain the oven’s appearance and functionality, ensuring it continues to perform at its best. Always avoid using abrasive cleaners or scourers to prevent damage to the surfaces.
Cleaning the Oven Floor and Drain
Cleaning the oven floor and drain is essential to remove food debris and prevent clogs. Start by ensuring the oven is completely cool. Remove any racks or accessories to access the floor thoroughly. For natural cleaning, mix baking soda, water, and vinegar to create a paste. Apply the paste to the floor and let it sit for 30 minutes to loosen grime. Use a soft-bristled brush or non-abrasive scrubber to gently scrub the floor, working in circular motions. Avoid using harsh chemicals or abrasive materials that could damage the surface. For the drain, use a small, gentle brush to remove any buildup. Rinse the area with a damp cloth and dry thoroughly to prevent water spots. Regular cleaning of the oven floor and drain ensures optimal performance and prevents unpleasant odors. Always refer to the manufacturer’s guidelines for specific recommendations.

Cleaning the Oven Door Glass
Wipe away loose debris with a damp cloth. Apply a baking soda and water paste, let it sit, then rinse and dry for a streak-free shine. Regular cleaning maintains clarity and hygiene.
Removing Tough Stains and Splatters
For stubborn stains and splatters on the Viking oven door glass, start by applying a thick paste of baking soda and water. Let it sit overnight to soften the grime. Use a steam cleaning method by placing water in the broiler pan and heating the oven to loosen tough residue. Avoid using abrasive scrubbers, as they can scratch the glass. Instead, gently scrub with a non-abrasive sponge or microfiber cloth. For particularly stubborn stains, a commercial glass cleaner or a mixture of equal parts water and white vinegar can be effective. Always rinse thoroughly with clean water and dry the glass to prevent streaks. Regular maintenance will keep your Viking oven door glass clear and sparkling, ensuring optimal visibility while cooking.
Achieving a Streak-Free Shine
To achieve a streak-free shine on your Viking oven door glass, use a microfiber cloth dampened with a mixture of equal parts water and white vinegar. Gently wipe the glass in a circular motion, ensuring all streaks and residue are removed. For a polished finish, buff the glass with a dry section of the microfiber cloth. Avoid using paper towels, as they can leave lint or streaks. For extra sparkle, apply a small amount of glass cleaner specifically designed for oven surfaces, but ensure it’s free of ammonia to prevent damaging the glass. Regularly cleaning and buffing will maintain a crystal-clear view, enhancing both functionality and aesthetics of your Viking oven. Consistency is key to keeping the glass in pristine condition.

Using the Self-Cleaning Feature
The self-cleaning feature on Viking ovens uses high heat to burn food residue into ash. Before starting, remove racks and ensure the oven is empty. Set the cycle, let it run, and allow the oven to cool. Wipe away ash with a damp cloth for a clean finish. Always follow manufacturer instructions for safe and effective cleaning.
Understanding the Self-Clean Cycle

The self-clean cycle on Viking ovens uses extremely high temperatures (around 800-900°F) to burn food residue into ash. This feature is energy-intensive but effective for tackling tough grime. Before starting, ensure the oven is completely empty, as racks and utensils can warp or discolor. Lock the door to ensure safety during the cycle. The process typically takes 2-4 hours, depending on soil level. Ventilation is crucial, as fumes may release during cleaning. Once complete, let the oven cool before wiping away ash with a damp cloth. Avoid using chemicals, as the high heat does the work. Regular use of this feature helps maintain oven efficiency and hygiene. Always refer to your Viking oven’s manual for specific cycle durations and safety guidelines.
Post-Self-Clean Maintenance and Safety
After the self-clean cycle, allow the oven to cool completely before opening the door. Wear gloves to protect hands from potential residual heat. Use a damp cloth or sponge to wipe away ash and residue, ensuring no abrasive materials are used. Avoid using chemical cleaners, as they can damage the finish. Check for any stubborn stains that may require additional scrubbing with a non-abrasive pad. Inspect racks and trays before replacing them, ensuring they are clean and free of food particles. Dispose of ash properly, ideally in a sealed container to prevent dust dispersal. Regular post-clean maintenance helps maintain the oven’s appearance and functionality. Always refer to your Viking oven’s manual for specific care instructions to ensure longevity and safety.