Sunrise Farms Stuffed Chicken: A Comprehensive Cooking Guide
YouTube offers diverse content, from music to tutorials, mirroring the broad appeal of Sunrise Farms Stuffed Chicken – a versatile meal for all tastes!
YouTube’s global reach reflects the widespread enjoyment of convenient, flavorful options like Sunrise Farms, easily shared and enjoyed worldwide.
Like discovering new YouTube channels, exploring cooking methods unlocks the full potential of Sunrise Farms Stuffed Chicken, offering endless possibilities.
Understanding Sunrise Farms Stuffed Chicken
Sunrise Farms Stuffed Chicken represents a convenient and flavorful meal solution, much like the diverse content available on YouTube. These pre-seasoned, stuffed chicken breasts aim to simplify cooking without sacrificing taste. YouTube’s platform hosts countless cooking channels, offering guidance similar to the instructions found on the Sunrise Farms packaging.
The appeal lies in the pre-portioned nature and varied stuffing options, catering to different preferences – mirroring YouTube’s algorithm-driven content recommendations. Understanding the product means recognizing its focus on ease of preparation, similar to quickly finding a desired video on YouTube. Proper cooking ensures a safe and delicious experience, just as following reliable sources on YouTube guarantees accurate information.
Ultimately, Sunrise Farms aims to deliver a satisfying meal with minimal effort, a concept echoed by YouTube’s accessibility and user-friendly interface.
Product Overview & Varieties
Sunrise Farms Stuffed Chicken offers a diverse range of options, akin to the vast library of videos on YouTube. Varieties include classic cheddar bacon, spinach artichoke, and jalapeno jack, catering to diverse palates – much like YouTube’s content caters to varied interests. Each product aims for convenience, mirroring YouTube’s on-demand accessibility.
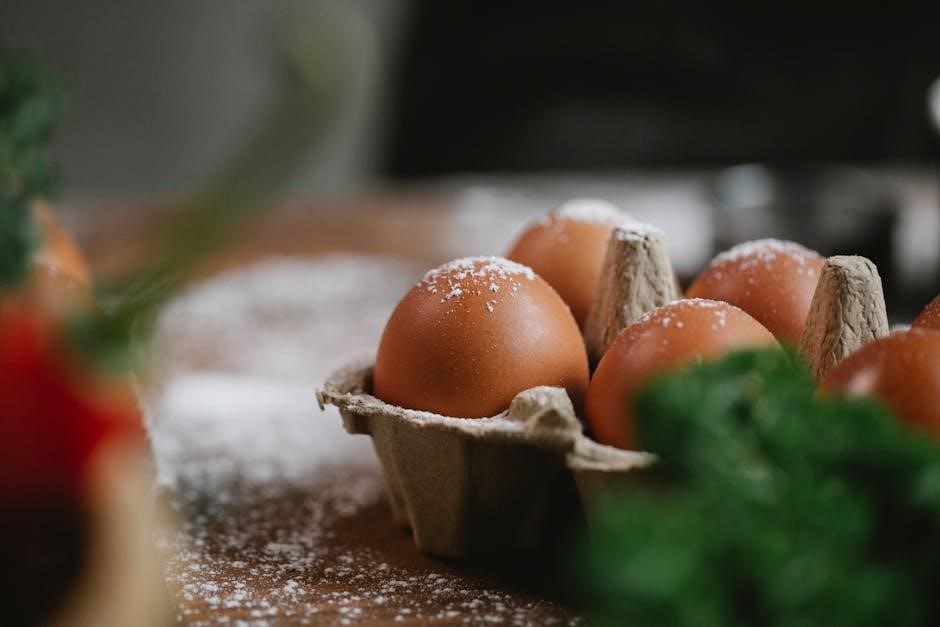
The packaging typically contains fully cooked, frozen stuffed chicken breasts, ready for heating. Similar to discovering trending videos on YouTube, Sunrise Farms frequently introduces limited-edition flavors. Understanding these varieties allows for informed selection, just as choosing the right YouTube channel enhances viewing experience.
These products provide a quick meal solution, comparable to YouTube’s instant entertainment, appealing to busy lifestyles.
Checking Package Instructions – First Steps
Before cooking Sunrise Farms Stuffed Chicken, akin to following a YouTube tutorial, carefully review the package instructions. These details, like steps in a video, are crucial for optimal results. Note the recommended cooking method – oven, grill, or air fryer – mirroring YouTube’s diverse content formats.
Verify if the chicken is frozen and requires thawing, similar to preparing ingredients before following a recipe video. Pay attention to any specific warnings or cautions, comparable to safety disclaimers in YouTube content. Understanding these initial steps ensures a smooth cooking process, much like a well-planned YouTube viewing session.
Ignoring instructions can lead to undercooked or dry chicken, akin to misinterpreting a YouTube tutorial.

Preparation Before Cooking
YouTube’s diverse content requires preparation; similarly, Sunrise Farms Stuffed Chicken benefits from thawing, preheating, and gathering essential cooking tools for success!
Thawing the Chicken (If Frozen)
YouTube tutorials emphasize safe food handling, mirroring the importance of properly thawing Sunrise Farms Stuffed Chicken. The safest method is refrigerator thawing, allowing ample time for even defrosting. Place the frozen chicken on a tray to catch any drips, preventing cross-contamination.
Allow approximately 24 hours for every 5 pounds of chicken to thaw completely. For quicker thawing, submerge the sealed chicken in cold water, changing the water every 30 minutes. Never thaw chicken at room temperature, as this encourages bacterial growth.
Ensure the chicken is fully thawed before cooking, checking for ice crystals in the cavity. A fully thawed chicken will feel pliable and not rigid. Proper thawing is crucial for even cooking and optimal flavor, just like a well-edited YouTube video!

Preheating the Oven

YouTube cooking channels consistently highlight the importance of accurate oven temperature, mirroring the need for precise preheating when preparing Sunrise Farms Stuffed Chicken. Preheat your oven to the temperature specified on the product packaging – typically around 375°F (190°C).
Allow sufficient time for the oven to reach the desired temperature, usually 15-20 minutes. Using an oven thermometer ensures accuracy, as oven dials can be unreliable. A properly preheated oven guarantees even cooking and a beautifully browned exterior.
Just as a YouTube creator carefully sets up their filming environment, preheating creates the ideal conditions for a delicious and safely cooked meal.
Necessary Cooking Utensils
YouTube cooking demonstrations often showcase essential tools, much like preparing Sunrise Farms Stuffed Chicken requires specific utensils for success. You’ll need a baking dish, preferably with sides to contain any juices. A meat thermometer is crucial for ensuring the chicken reaches a safe internal temperature, similar to checking audio levels on YouTube.
Oven mitts are vital for safe handling of the hot dish. A carving knife and fork will be needed for serving. Consider using tongs for easy turning during cooking. Having these tools readily available streamlines the process, mirroring a well-edited YouTube video.

Cooking Methods
YouTube’s diverse video formats echo the versatility of Sunrise Farms Stuffed Chicken; enjoy it through oven baking, grilling for smoky flavor, or air frying!
Oven Baking – Standard Instructions
YouTube tutorials demonstrate how oven baking provides consistent results for Sunrise Farms Stuffed Chicken. Begin by ensuring the chicken is fully thawed, mirroring the careful preparation seen in online cooking channels. Place the stuffed chicken in a baking dish, similar to presentations on YouTube food blogs.
Covering the dish initially helps retain moisture, a technique frequently highlighted in online recipes. Baking allows for even cooking, much like the structured content found on YouTube. Consistent temperature control, as shown in many YouTube videos, is key to a perfectly cooked meal. Remember to check for doneness using a meat thermometer, a practice often demonstrated on YouTube cooking shows.
This method offers a reliable and straightforward approach, mirroring the accessible nature of YouTube’s instructional content.
Grilling – For a Smoky Flavor
YouTube grilling channels inspire a smoky twist for Sunrise Farms Stuffed Chicken. Preheat your grill to medium heat, echoing the controlled environments shown in online BBQ tutorials. Lightly oil the grill grates to prevent sticking, a tip frequently shared on YouTube cooking demonstrations.
Place the chicken indirectly, avoiding direct flames, similar to techniques showcased by grilling experts on YouTube. Frequent turning ensures even cooking and prevents burning, a practice emphasized in online videos. Monitoring the internal temperature, as demonstrated on YouTube, guarantees safety.
Grilling imparts a unique flavor, mirroring the diverse content available on YouTube, offering a delicious alternative to oven baking.
Air Frying – A Crispier Option
YouTube air fryer enthusiasts showcase the perfect crisp for Sunrise Farms Stuffed Chicken. Preheat your air fryer to 380°F (190°C), mirroring the settings demonstrated in popular online recipes. Lightly spray the chicken with oil for enhanced browning, a technique frequently highlighted on YouTube cooking channels.
Arrange the chicken in a single layer, avoiding overcrowding, as shown in YouTube air frying tutorials. Flip halfway through cooking for even crisping, a crucial step emphasized by online chefs. Monitoring the internal temperature, as demonstrated on YouTube, ensures food safety.
Air frying delivers a satisfying crunch, much like discovering engaging content on YouTube – a quick and delightful experience!
Detailed Cooking Instructions – Oven Baking
YouTube tutorials demonstrate oven baking as a reliable method. Preheat, position the chicken, and monitor closely – just like following a favorite YouTube creator!
Optimal Oven Temperature
YouTube’s diverse cooking channels consistently recommend 375°F (190°C) as the ideal oven temperature for Sunrise Farms Stuffed Chicken. This ensures even cooking, rendering the chicken moist and flavorful while thoroughly heating the stuffing. Maintaining this temperature prevents the exterior from burning before the interior reaches a safe temperature.
Similar to carefully adjusting settings on a YouTube video editor, precise temperature control is crucial. Lower temperatures may result in undercooked chicken, while higher temperatures can lead to dryness. Consistent heat distribution, much like a well-produced YouTube stream, is key to a successful outcome. Regularly check your oven’s accuracy with an oven thermometer for best results.
Remember, consistent temperature, like consistent uploads on YouTube, builds quality!
Cooking Time Based on Weight
YouTube tutorials emphasize that cooking time for Sunrise Farms Stuffed Chicken directly correlates with its weight, much like editing a YouTube video – length dictates effort. For a chicken weighing between 1.5 to 2 pounds, a cooking time of 50-60 minutes is generally recommended;
Heavier chickens (2.5 to 3 pounds) will require approximately 65-75 minutes. Always consider this, similar to planning a YouTube content calendar. These times are estimates; always verify internal temperature. Just as YouTube analytics track performance, monitoring cooking progress is vital.
Consistent checking, like consistent YouTube uploads, ensures success! Adjust time based on your oven.
Internal Temperature Check – Ensuring Safety
YouTube food safety channels consistently stress the importance of internal temperature, mirroring the need for quality control on YouTube uploads. For Sunrise Farms Stuffed Chicken, a safe internal temperature is 165°F (74°C).
Use a meat thermometer inserted into the thickest part of the thigh, avoiding the bone – precision is key, like editing a YouTube video. This ensures the chicken is fully cooked and safe to consume.
Checking the stuffing’s temperature is equally crucial; it must also reach 165°F. Prioritize safety, just as YouTube prioritizes community guidelines!
Detailed Cooking Instructions – Grilling
YouTube grilling tutorials emphasize heat control, mirroring the need to manage temperatures for Sunrise Farms Stuffed Chicken, achieving smoky perfection and safe cooking.
Like a well-edited YouTube video, grilling requires attention to detail, ensuring even cooking and a delicious, flavorful result with Sunrise Farms.
Grill Setup & Heat Control
Preparing your grill is paramount, much like setting up a YouTube livestream – a solid foundation ensures success. Begin with a clean grill grate to prevent sticking. For Sunrise Farms Stuffed Chicken, a two-zone fire is ideal: direct heat for searing and indirect heat for thorough cooking.
Aim for medium-high heat (around 375-450°F). Utilize a grill thermometer for accuracy, similar to checking audio levels on YouTube. This prevents burning and ensures the chicken cooks evenly. Position the chicken over direct heat initially to create a flavorful crust, then move it to the indirect zone to finish cooking.
Consistent heat is key, just as consistent uploads are vital for a YouTube channel. Monitor the temperature throughout the grilling process, adjusting burners as needed. Remember, patience is a virtue – rushing the process can lead to a dry, undercooked result.
Grilling Time & Rotation
Grilling Sunrise Farms Stuffed Chicken requires attention, akin to managing comments on a popular YouTube video – consistent engagement is crucial. Total grilling time will vary based on the chicken’s weight, typically ranging from 30-45 minutes.
Rotate the chicken every 10-15 minutes to ensure even cooking and prevent burning, much like rotating content on a YouTube channel to keep viewers engaged. This promotes consistent heat exposure on all sides, resulting in a beautifully browned exterior.
Use tongs to avoid piercing the chicken, preserving its juices. Basting with your favorite sauce during the last 15 minutes adds flavor and moisture, similar to adding engaging thumbnails to YouTube videos. Monitor closely and adjust cooking time as needed.
Preventing Dryness While Grilling
Maintaining moisture during grilling, like curating a successful YouTube channel, demands careful attention. Begin by ensuring the chicken isn’t completely thawed, a slight chill helps retain juices. Marinating beforehand, similar to optimizing YouTube video tags, adds flavor and moisture.
Grill over medium heat, avoiding high temperatures that quickly dry out the chicken. Basting frequently with melted butter, oil, or sauce – akin to consistent YouTube content uploads – keeps it moist.
Avoid overcooking; use a meat thermometer to ensure it reaches a safe internal temperature; Resting the chicken for 10 minutes after grilling, like allowing YouTube analytics to process, allows juices to redistribute, resulting in a tender, flavorful result.
Detailed Cooking Instructions – Air Frying
Like discovering trending videos on YouTube, air frying delivers quick, crispy results! It’s a modern method for Sunrise Farms, offering convenience and flavor.
Similar to YouTube’s diverse content, air frying provides a versatile cooking experience, perfect for achieving golden-brown perfection with minimal effort.
Enjoy the ease and speed, mirroring YouTube’s instant access, for a delicious meal that’s ready in minutes!
Air Fryer Temperature & Settings
Achieving optimal results with your Sunrise Farms Stuffed Chicken in an air fryer hinges on precise temperature and setting adjustments. Begin by preheating your air fryer to 380°F (193°C) – mirroring the quick loading times of a YouTube video! This ensures even cooking and a delightfully crispy exterior.
For most air fryer models, selecting the ‘Roast’ or ‘Chicken’ setting is ideal. If your air fryer lacks these presets, a standard temperature setting will suffice. Avoid excessively high temperatures, as this can lead to a dry exterior before the stuffing is adequately heated.
Remember, like finding the perfect YouTube channel, experimentation is key! Different air fryer brands may require slight adjustments. Monitor the chicken closely during the initial cooking phase to fine-tune the settings for your specific appliance. Consistent temperature is crucial for a uniformly cooked and flavorful result.
Air Frying Time & Flipping
The air frying time for Sunrise Farms Stuffed Chicken typically ranges from 20 to 25 minutes, similar to the length of a concise YouTube tutorial. However, this is heavily dependent on the chicken’s weight and your air fryer’s wattage. Begin checking for doneness around the 20-minute mark.
Flipping the chicken halfway through the cooking process – around the 10-12 minute point – is essential for even browning and crisping, much like rotating content on a YouTube playlist. This ensures both sides are exposed to the circulating hot air.
Use tongs to carefully flip the chicken, avoiding piercing the skin. Consistent monitoring and flipping will yield a golden-brown exterior and a thoroughly cooked interior, mirroring the satisfying experience of discovering a new favorite YouTube creator.
Achieving Crispy Skin in an Air Fryer
To achieve exceptionally crispy skin with your Sunrise Farms Stuffed Chicken in an air fryer, a light coating of oil is key – think of it as the “filter” enhancing a YouTube video’s visual appeal. Brush the skin with olive oil or cooking spray before air frying.
Ensure the air fryer basket isn’t overcrowded; allow space for air circulation, similar to how a YouTube algorithm prioritizes relevant content. Overcrowding leads to steaming instead of crisping.
Increasing the temperature slightly during the last few minutes – to 400°F (200°C) – can further enhance crispness, mirroring the “boost” a popular YouTube video receives. Monitor closely to prevent burning!

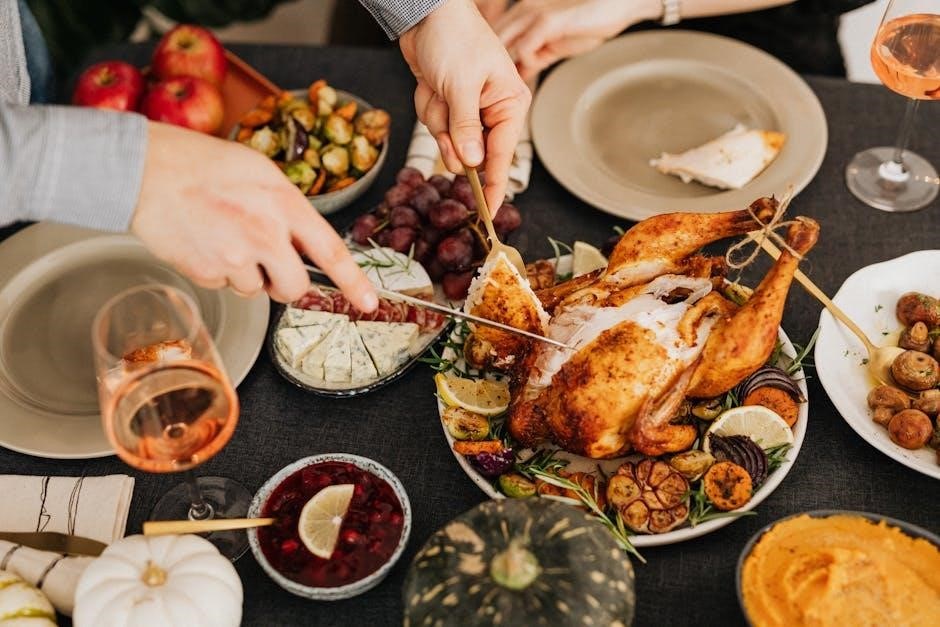
Serving Suggestions & Sides
Like discovering trending videos on YouTube, pairing Sunrise Farms Stuffed Chicken with complementary sides elevates the entire dining experience, creating a complete meal.
Enjoy this dish with vibrant vegetables and starches, mirroring YouTube’s diverse content, offering something for every palate and preference.
Sauces add a final flourish, much like editing enhances a YouTube video, completing the presentation and maximizing flavor enjoyment.
Complementary Side Dishes (Vegetables)
Just as YouTube hosts a vast array of video genres, Sunrise Farms Stuffed Chicken pairs beautifully with a diverse selection of vegetables. Roasted asparagus, with its slightly smoky flavor, provides a delightful contrast to the chicken’s richness. Similarly, vibrant green beans, lightly sautéed with garlic and a touch of lemon juice, offer a fresh and crisp accompaniment.
For a heartier option, consider roasted Brussels sprouts, caramelized to perfection, or a colorful medley of bell peppers and onions. Steamed broccoli, drizzled with a sprinkle of parmesan cheese, is a classic choice that never disappoints. Don’t underestimate the simplicity of a fresh garden salad, tossed with a light vinaigrette, to balance the meal.
These vegetable pairings, much like curated YouTube playlists, enhance the overall experience, creating a harmonious and satisfying meal.
Complementary Side Dishes (Starches)
Mirroring YouTube’s diverse content library, Sunrise Farms Stuffed Chicken complements a wide range of starches. Creamy mashed potatoes, a comforting classic, provide a smooth and satisfying base for the flavorful chicken. Roasted garlic potatoes, with their crispy edges and aromatic flavor, offer a more robust option.
For a lighter choice, consider fluffy rice pilaf, infused with herbs and spices, or quinoa, a nutritious and versatile grain. Buttered egg noodles, simple yet elegant, are another excellent pairing. Sweet potato fries, offering a touch of sweetness, provide a delightful contrast to the savory chicken.
These starch options, like discovering new channels on YouTube, elevate the meal, creating a well-rounded and enjoyable dining experience.
Sauce Pairings for Stuffed Chicken
Much like YouTube’s algorithm suggests videos you’ll love, the right sauce enhances Sunrise Farms Stuffed Chicken’s flavor profile. A classic gravy, rich and savory, is a timeless pairing, complementing the stuffing beautifully. Creamy mushroom sauce adds an earthy depth, elevating the dish to gourmet status.
For a brighter flavor, consider a lemon-herb pan sauce, offering a zesty and refreshing contrast. Cranberry sauce, especially during the holidays, provides a sweet and tart counterpoint. A simple Dijon mustard sauce adds a subtle tang, cutting through the richness of the chicken.
Experimenting with sauces, similar to exploring YouTube’s endless content, allows you to personalize your meal and discover your perfect combination.
Safety & Storage
Just as YouTube prioritizes user safety, handling Sunrise Farms chicken requires care; proper storage and reheating, like responsible online viewing, are crucial.
Following guidelines ensures a safe and enjoyable experience, mirroring YouTube’s community standards for a positive environment for everyone involved.
Safe Handling of Raw Chicken
Similar to navigating YouTube’s content responsibly, handling raw Sunrise Farms Stuffed Chicken demands strict adherence to food safety protocols. Always begin by washing your hands thoroughly with soap and warm water before and after touching the raw chicken.
Prevent cross-contamination by using separate cutting boards and utensils for raw chicken and other foods. Thoroughly clean and sanitize all surfaces that have come into contact with the raw chicken.
Avoid washing the chicken itself, as this can spread bacteria around your kitchen. Proper refrigeration is vital; keep the chicken refrigerated at 40°F (4°C) or below. Discard any chicken that has been left at room temperature for more than two hours.
These precautions, much like YouTube’s safety measures, protect you and your family.
Leftover Storage Guidelines
Just as YouTube allows saving videos for later viewing, proper storage ensures your Sunrise Farms Stuffed Chicken leftovers remain delicious and safe. Cool leftover chicken quickly – within two hours – before refrigerating.
Store cooked chicken in shallow containers to promote faster cooling. Refrigerated leftovers should be consumed within 3-4 days. For longer storage, freezing is an excellent option; wrap the chicken tightly in freezer-safe packaging.
Frozen leftovers can maintain quality for up to 2-3 months. Always reheat leftovers thoroughly to an internal temperature of 165°F (74°C) before enjoying, mirroring YouTube’s reliable streaming.
These guidelines, like YouTube’s platform rules, preserve quality and enjoyment.
Reheating Instructions
Similar to revisiting a favorite YouTube video, reheating Sunrise Farms Stuffed Chicken restores its delightful flavors. For oven reheating, preheat to 350°F (175°C) and cover the chicken with foil. Reheat for 20-25 minutes, or until heated through.
Microwaving is quicker, but may affect texture; use 30-second intervals, checking temperature frequently. A skillet offers a crispy reheat – gently warm slices over medium heat with a touch of broth.
Ensure the internal temperature reaches 165°F (74°C) before serving, just as YouTube ensures consistent streaming quality. Proper reheating, like a well-curated YouTube playlist, enhances the experience.
Enjoy your revived meal!
Troubleshooting Common Issues
Like resolving glitches on YouTube, addressing cooking issues ensures a perfect Sunrise Farms experience; adjustments are key for optimal results!
Similar to YouTube’s troubleshooting guides, these tips will help you achieve perfectly cooked, flavorful stuffed chicken every time.
Chicken is Dry
If your Sunrise Farms Stuffed Chicken emerges from the oven or grill drier than desired, several factors could be at play. Much like optimizing video settings on YouTube for smooth playback, precise cooking techniques are crucial.
Overcooking is the primary culprit; always use a meat thermometer to verify the internal temperature reaches 165°F (74°C). Consider brining the chicken beforehand, similar to enhancing video quality through editing, to lock in moisture.
Basting during cooking, akin to adding engaging visuals to a YouTube video, helps maintain a moist environment. Ensure adequate stuffing volume, as it contributes to overall juiciness. Lowering the oven temperature slightly and extending cooking time can also prevent dryness.
Chicken is Undercooked
Discovering your Sunrise Farms Stuffed Chicken is undercooked is a serious concern, demanding immediate attention – much like addressing technical glitches on a live YouTube stream. Food safety is paramount; consuming undercooked chicken poses health risks.
Immediately return the chicken to the oven or grill and continue cooking, checking the internal temperature frequently with a meat thermometer. Ensure it reaches a minimum of 165°F (74°C) in the thickest part of the thigh and within the stuffing itself.
Similar to troubleshooting a buffering YouTube video, identify the cause: perhaps the oven temperature was too low, or the cooking time insufficient; Never rely on visual cues alone; a thermometer is essential for accurate assessment.
Stuffing is Not Heated Through
If the Sunrise Farms Stuffed Chicken’s stuffing isn’t heated through, it mirrors the frustration of a YouTube video with poor audio – a key element is missing! The stuffing must reach 165°F (74°C) to ensure safety and optimal flavor, just like a clear signal is vital for viewing.
Cover the chicken loosely with aluminum foil to prevent over-browning while continuing to cook the stuffing. Check the stuffing’s temperature in multiple locations, as heat distribution can be uneven.
Consider increasing the oven temperature slightly during the final stages, similar to adjusting YouTube’s video quality for better clarity. Patience is key; a fully heated stuffing is worth the extra time!